
Automotive
A tint strip on a windshield is an aftermarket adhesive film applied to the top few inches of glass to cut glare, and it almost always goes on the inside surface. Factory shade bands are different: they’re embedded in the glass itself during manufacturing. Before applying one, check your state’s window laws or jump to the install and removal steps below.
TL;DR:
- Keep aftermarket film above the windshield’s marked legal line; federal rules require at least 70% light transmission below it, and state limits can be stricter.
- Find the printed legal mark near the glass’s top edge and feel for a seam: factory pigment sits flush, while adhesive film has an edge.
- A strip only covers the windshield’s upper band, may cause haze or distortion at night, and can lift or discolor within one or two years.
- After installation, leave the film undisturbed for 1 to 10 days; hire a professional near ADAS cameras, damaged glass, or heavy residue.
Table of Contents
- Factory shade band vs. aftermarket tint strip
- Benefits and real-world limits of a tint strip
- Is a windshield tint strip legal, and how dark can it be?
- What to look for when buying a tint strip kit
- How to install a windshield tint strip step by step
- How to remove a tint strip without damaging the glass
- Fixing bubbles, peeling, and cloudy spots after install
- When hiring a pro makes more sense than DIY
- Our take on DIY versus professional glass work
- Need glass work done right? Here’s how we help
- FAQ
- Sources
Factory shade band vs. aftermarket tint strip
The dark band you see across the top of many windshields from the factory is a shade band: pigment baked into the glass laminate itself, typically 3 to 6 inches deep. It’s permanent, legal by design, and can’t be removed or adjusted.
An aftermarket tint strip is something else entirely. It’s a thin adhesive film, usually polyester or vinyl-based, that a car owner or installer applies to the inside surface of the glass above the ceramic frit line. These films come in a range of visible light transmission (VLT) percentages, typically varying to balance glare reduction and night visibility, and the lower the number, the darker the strip.
Telling them apart matters because only one of them is subject to installation rules. To check what you’re dealing with:
- Look for a faint printed “AS-1” mark near the top edge of the glass. This line is your legal reference point for where darker material can start.
- Run a finger along the inside top edge. A factory band feels flush with the glass, while an adhesive strip has a slight edge or seam.
- Hold a flashlight behind the band at night. Embedded shade bands look uniform and glass-deep; aftermarket film often shows a visible film edge or slight bubbling at the border.
Benefits and real-world limits of a tint strip
A tint strip earns its keep for one reason: it blocks sun glare right at eye level without covering your whole windshield. It also knocks down some UV and heat hitting the dashboard, and it’s a cheap way to dress up an older car’s look.
- Cuts sun and headlight glare in the driver’s direct line of sight.
- Reduces some UV exposure and dash heat buildup.
- Costs far less than full windshield tinting and installs in under an hour.
The trade-offs are real, though. Coverage is limited to a narrowband, so it won’t help with glare lower on the windshield. Some drivers notice slight optical distortion or haze at night, especially with cheaper films. And unlike professionally installed full-window tint, strips tend to lift or discolor within a year or two.
A strip makes sense if you want a quick, affordable glare fix or a specific look for a short period. If you’re after lasting UV protection or a cleaner factory appearance, full-window tint or OEM-style glass is the better fit.
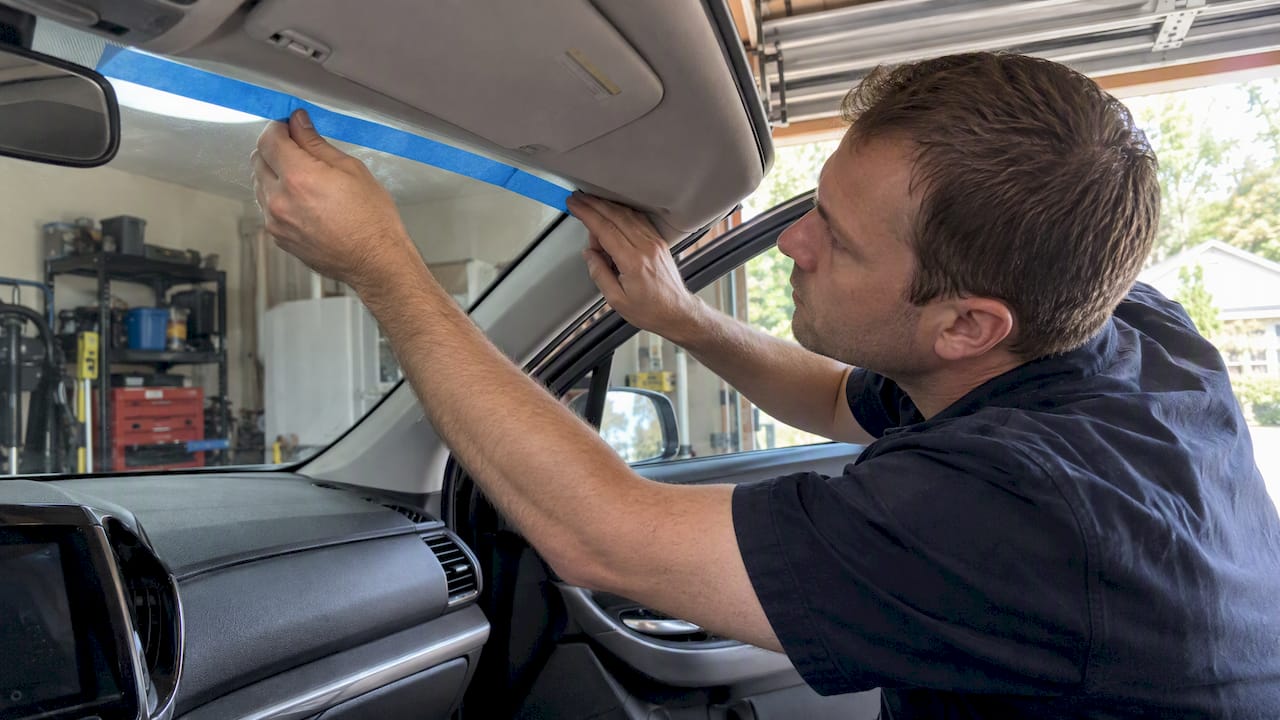
Pro Tip: If you’re on the fence, apply painter’s tape where you think the strip should sit and drive with it for a day before committing to adhesive film.
Is a windshield tint strip legal, and how dark can it be?
Federal rules don’t ban shade bands or tint strips outright. Under FMVSS No. 205, any windshield area with less than 70% light transmittance must sit above the AS-1 line, which marks where reduced visibility becomes acceptable. Below that line, in the driver’s primary sightline, glass must let through at least 70% of light.
The 70% transmittance threshold set by FMVSS No. 205 is the baseline every state tint law builds on, meaning a strip placed below the AS-1 mark that blocks more light than that can put you out of compliance even before state law gets involved.
NHTSA guidance on aftermarket tinting draws a distinction worth knowing: vehicle owners can legally modify their own glazing, but manufacturers and repair businesses face liability if they install tint that drops required visibility areas below that 70% figure.
States layer their own rules on top. California’s Vehicle Code Section 26708 bars anything that obstructs a driver’s clear view, but allows a clear or colorless strip at the top of the windshield as long as it stays within specific height and placement limits. Other states set their own thresholds, so a strip legal at home might not pass inspection elsewhere.
A quick compliance checklist before you apply anything:
- Measure or check the labeled VLT rating of your film.
- Keep the strip entirely above the AS-1 line.
- Avoid red, amber, or reflective colors, which many states restrict outright.
- Remove the strip immediately if it blocks your sightline at night or in bright sun.
What to look for when buying a tint strip kit
Not all kits are built the same, and the cheapest option online isn’t always the safest bet for your glass or your state’s rules. Stick to films that list their VLT rating for the best balance of glare reduction and night visibility; avoid products without a stated transmittance percentage.
A decent kit should include:
- Pre-cut or roll film with a protective liner.
- A hard squeegee for smoothing and a soft one for final passes.
- Application fluid (usually a mild soap and water solution).
- Instructions noting a workable temperature range, typically between 40°F and 98°F.
Mass retailers and online marketplaces both carry universal-fit strips at low prices, but quality and included tools vary widely between listings. If a kit skips the application fluid or temperature guidance, expect a rougher install.
How to install a windshield tint strip step by step
Work in a shaded, dust-free space. Garages work better than driveways, since direct sun and wind both cause bubbling and debris under the film.
- Clean the inside glass thoroughly with a lint-free cloth and ammonia-free cleaner.
- Measure and mark where the AS-1 line or ceramic frit edge sits, since your film’s bottom edge should align just above it.
- Mist the glass with application fluid to allow repositioning.
- Peel back a few inches of liner, apply the exposed edge, and work outward.
- Use a relief “T” cut near the rearview mirror mount or top molding clips so the film lays flat around obstructions.
- Squeegee from the center outward in overlapping strokes to push out fluid and air.
- Trim excess film with a sharp blade along the edges.
- Let the film cure undisturbed for 1 to 10 days before rolling down windows near it, per manufacturer installation guidance.
Pro Tip: Apply film when temperatures are within a workable range to ensure the adhesive sets properly and minimize bubbling.
How to remove a tint strip without damaging the glass
Removing an old or peeling strip takes patience more than strength. Warm the film first with a hairdryer on low heat, then peel slowly at a low angle rather than pulling straight up, which reduces tearing and leaves less residue behind.
- Work in small sections rather than trying to peel the whole strip at once.
- Use isopropyl alcohol or a dedicated adhesive remover on leftover residue, applied with a soft cloth rather than a razor blade near the frit edge.
- Avoid metal scrapers near the top of the glass where defroster wires or antenna elements may run.
- If residue won’t budge after a reasonable round of solvent and gentle scraping, stop before you risk scratching the glass.
For a deeper look at safe residue removal methods, this tint removal guide covers techniques that apply equally well to windshield strips. Call a professional if you notice frit damage, heavy baked-on residue, or if the strip sits anywhere near an ADAS camera housing, since scratching that zone can affect sensor performance.
Fixing bubbles, peeling, and cloudy spots after install
Small bubbles usually mean trapped air, not dust, and they often work themselves out within a day or two of curing. If one persists, a pinprick with a fine needle followed by a light resqueegee usually flattens it.
- Trapped dust under the film looks like a speck with a slight halo. A pinprick and gentle pressure can flatten it, though it’s less forgiving than an air bubble.
- Edge lifting after a few weeks typically means contamination during install. At that point, replacement film is the only real fix.
- Clean the strip only with ammonia-free glass cleaner, since harsher chemicals can cause shrinkage or break down the adhesive over time.
When hiring a pro makes more sense than DIY
A tint strip is a low-stakes DIY project on most cars. That changes fast when the work touches anything near your windshield’s ADAS cameras, a cracked or chipped glass surface, or a full windshield that needs replacing rather than patching.
- Removal near forward-facing cameras or rain sensors carries real risk of misaligning hardware that needs precise recalibration.
- A windshield with chips or pits under an old strip often needs repair or replacement before new film goes on.
- Jobs involving ADAS systems benefit from in-house calibration rather than a second trip to a dealership.
- Insurance-covered glass work is simpler when a provider bills the claim directly instead of you filing it yourself.
We handle all three: removal-adjacent glass repair, full windshield replacement, and ADAS recalibration, in a single mobile visit with quality materials and a warranty on the install.
Our take on DIY versus professional glass work
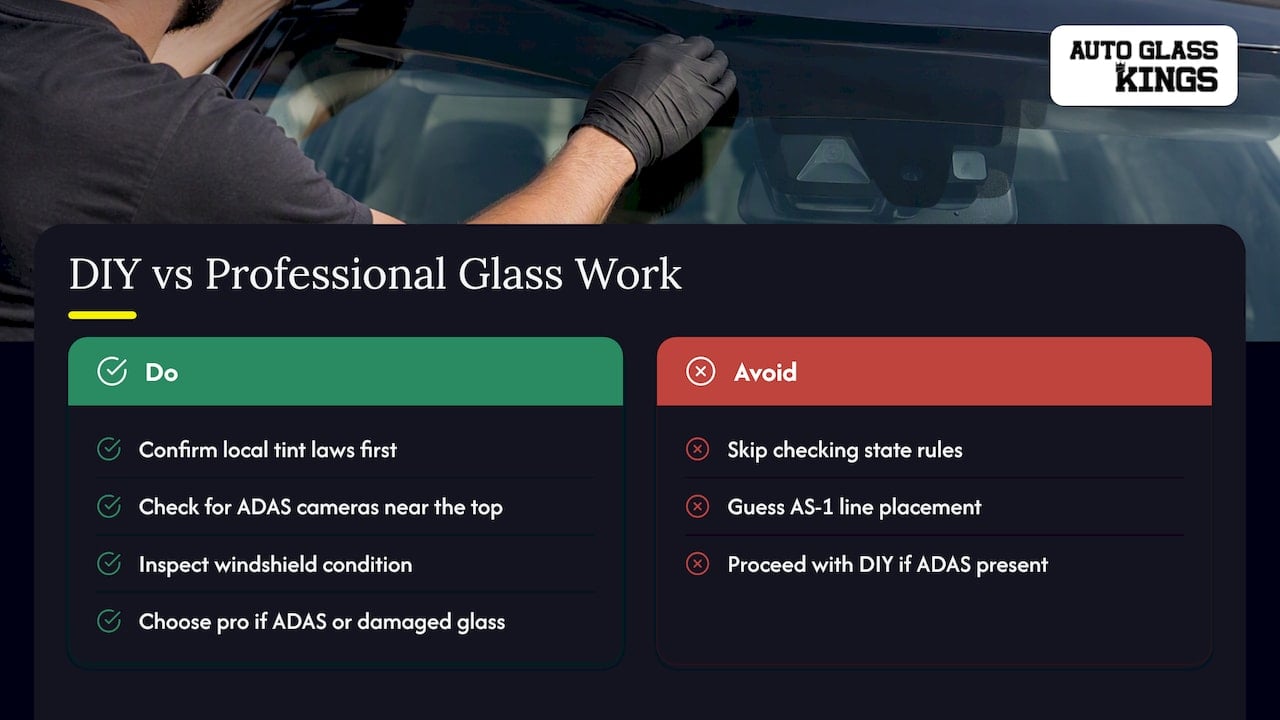
A tint strip is a fine weekend project if your car has no ADAS cameras near the top of the glass and the windshield itself is in good shape. Where it gets risky is when people skip checking their state’s tint law or guess at where the AS-1 line sits, since both mistakes are easy to avoid and hard to undo once adhesive cures.
Confirm your local rules first, then decide whether a kit or a professional visit fits your situation better.
— Auto Glass Kings
Need glass work done right? Here’s how we help
If your old tint strip removal reveals a chip, a crack, or adhesive damage near the frit, we handle the fix without a second appointment. Our mobile service comes to you locally, starting early in the morning, and every windshield we install carries a lifetime warranty with quality materials.
- Mobile windshield replacement and repair, done at your home or office.
- ADAS calibration completed during the same visit, no dealership trip needed.
- Direct insurance billing available.
- Service for a range of vehicles, including high-end brands.
If a strip removal uncovers a problem bigger than a weekend fix, get a free quote and we’ll handle the rest.
FAQ
What does a windshield tint strip do?
A tint strip reduces sun and headlight glare right at the driver’s eye level by darkening the top few inches of the windshield. It also cuts some UV exposure and dashboard heat, though its coverage is limited to that narrow band.
What is the strip of tint on the front windshield called?
It’s commonly called a tint strip, visor strip, or shade band, though a true shade band is factory-embedded pigment rather than adhesive film. Aftermarket versions are typically just labeled tint strips or glare strips on packaging.
Do cops pull over for windshield tint?
Yes, officers can stop a vehicle if a windshield strip sits below the AS-1 line or blocks the driver’s view, since this violates state obstruction laws like California’s VEH 26708. Enforcement and exact limits vary by state.
Does the windshield tint strip go on inside or outside?
Aftermarket tint strips are applied to the inside surface of the glass, which protects the film from weather and makes it easier to remove later. Installing film on the exterior exposes it to wipers, road debris, and faster wear.
Sources
- NHTSA interpretation on shade bands and FMVSS No. 205
- California Vehicle Code — VEH 26708
- GILA windshield glare strip installation instructions
Recommended
- Match Glass to Your Sensors: OEM vs Aftermarket for HUD and ADAS
- DIY or Mobile Pro: Quarter Glass Replacement, ADAS and Drive Away Rules
- Drivers: Get OEM Verified Windshield ADAS Calibration in One Visit
- Drivers: Lane Assist Not Working? 5 Minute Checks and Mobile ADAS Fix
🎧 Listen to This Article
Share
Recent Posts

October 26, 2026
Heads-Up Display Windshield: What Changes When You Replace It
A HUD windshield is built differently from standard glass. See how it works, what to check before replacement, and why calibration matters in...
October 25, 2026
Lifetime Windshield Warranty: What It Covers and What It Doesn’t
A lifetime windshield warranty rarely covers everything. Learn what it should include, what it excludes, and how ADAS calibration and insurance fit in....
October 24, 2026
Rearview Mirror Reattachment: DIY Steps and When to Call a Pro
Rearview mirror fell off the windshield? Learn when a DIY glue kit works, when the glass is damaged, and how a mobile pro...