
Automotive
Snap-in reveal molding is usually a DIY-friendly repair, and parts alone run about $30 to $120. But if your molding is bonded or encapsulated into the glass, if the pinch-weld shows rust, or your windshield carries a camera or heads-up display, hand it to a professional. Full professional replacement with moldings and calibration typically falls within a wide price range depending on the vehicle.
TL;DR:
- Replacing snap-in or reveal molding is usually a straightforward DIY task if the molding is not bonded or encapsulated, but rust or sensors require professional service.
- Identifying the molding type involves checking for clips, rubber wrapping, or fusion to the glass, which determines whether it can be removed safely at home.
- Rust, urethane damage, or windshield-mounted sensors indicate you should seek professional replacement to ensure safety and proper calibration.
- Tools like plastic trim removal tools, clip pliers, and a heat gun are essential for a successful DIY job, and matching parts to your VIN is crucial.
- A professional replacement costs typically between $125 and $400 for moldings alone, but full windshield replacement with calibration can exceed $1,600, especially on vehicles with advanced safety features.
Table of Contents
- What Windshield Molding Replacement Actually Involves
- Is Your Molding the Real Problem, or Something Bigger?
- Tools and Parts You Need Before You Start
- How to Remove and Install Snap-In Molding Yourself
- Confirming the Installation Actually Worked
- What a Fair Quote Looks Like If You Hire a Pro
- The Safety Risk Behind a Bad Molding Job
- Our Take: When We Tell Customers to DIY and When We Don’t
- Ready to Book a Professional Windshield Molding Replacement?
- Sources
- FAQ
What Windshield Molding Replacement Actually Involves
Before buying anything, figure out which kind of molding you’re dealing with. That single detail decides whether you’re looking at a 30-minute driveway fix or a job that needs a trained tech and a bonding station.
Most passenger vehicles use one of four molding types:
- Snap-in or reveal molding sits on top of the glass edge and clips into place along the pinch-weld. This is the type most DIYers can actually handle.
- Gasket-style molding wraps around the entire glass edge like a rubber frame, common on older trucks and some classic cars. It can be reasonably accessible, but removal often disturbs the seal underneath.
- Encapsulated or bonded molding is molded directly onto the glass at the factory and adhered with urethane as part of the windshield itself. You cannot separate this molding from the glass without replacing the whole unit.
- Decorative cowl and A-pillar trim pieces sit near the molding but aren’t structural. They’re usually held by push clips and are the easiest of the bunch to swap.
To identify what you have, run a fingernail along the edge. If you feel a lip you can lift with a plastic trim tool, it’s likely snap-in. If the rubber wraps continuously around the glass with no visible clips, it’s gasket-style. If the trim looks fused to the glass with no seam at all, it’s encapsulated, and replacing it without proper technique risks cracking the glass or gouging the paint. Universal strips fit generic gasket and reveal applications; encapsulated and many late-model reveal moldings only come as OE-matched parts tied to your VIN.
Is Your Molding the Real Problem, or Something Bigger?
Not every gap or flapping edge means you need new trim. Run through these checks before you order parts:
- Look for pure cosmetic wear. Cracked, sun-bleached, or brittle rubber with no water intrusion is a straightforward molding-only fix.
- Check for a loose edge. If the molding lifts in one spot but sits flush everywhere else, a missing or broken clip is often the culprit, not a failed windshield seal.
- Run a hose test. Spray a gentle stream of water along the molding line for a few minutes while someone watches inside for drips, especially near the header and A-pillars.
- Sniff and feel for hidden leaks. A musty smell, damp carpet, or fogged windows after rain point to water getting past the seal, not just the trim.
- Inspect the pinch-weld for rust. Any orange staining or bubbling paint along the metal channel under the molding is a stop sign for DIY work.
- Check for cracks near the edge. A windshield crack that runs close to the pinch-weld can spread further once you start pulling on the trim.
If you spot rust, urethane damage, or your vehicle has a windshield-mounted camera or HUD, stop here. A wind whistle or leak after a bad reseal often means the installation was wrong the first time, and chasing that with more DIY work usually makes it worse.
Tools and Parts You Need Before You Start
Rushing this step is the most common reason DIY molding jobs turn into a second trip to the parts store. Gather everything first, and check that your replacement molding actually matches your make, model, and year.
Tools that make the difference:
- A set of plastic trim removal tools (never metal screwdrivers, which gouge paint and scratch glass)
- Interior trim clip pliers for pulling and reseating push clips
- A heat gun or hair dryer to soften old adhesive without damaging paint
- Painter’s tape to protect the surrounding paint edge
- Microfiber cloths and glass cleaner for a clean, debris-free channel
Parts and consumables to buy, including replacement molding and clips, are readily available at Flash Pecas Import, which offers a wide selection of authentic and compatible auto parts for various makes and models.
- Replacement molding matched to your VIN, or a compatible universal strip for gasket-style trim
- A full set of new plastic clips (reusing old, brittle clips is the top cause of loose molding within months)
- Automotive-grade urethane adhesive only if your specific molding calls for it
- Adhesive remover or primer for cleaning the old bonding surface
Retailers like AutoZone list common OE and aftermarket molding and clip kits in the $20 to $150 range, depending on part type and whether clips are included.
Pro Tip: Skip the tube of household silicone caulk sitting in your garage. It looks like a quick fix, but it traps moisture underneath the molding and speeds up rust instead of preventing it.
How to Remove and Install Snap-In Molding Yourself
This process applies specifically to accessible snap-in or reveal molding, not gasket or encapsulated types. If you’re not sure which one you have, go back and check the identification section before you touch a trim tool.
1. Prep the work area. Park in shade so the adhesive and plastic aren’t baking in direct sun, which makes trim brittle and adhesive gummy. Take a photo of the molding’s current fit and gaps so you have a reference. Run painter’s tape along the paint edge next to the trim to protect it from scratches.
2. Locate the seam and start release. Find where the molding begins, usually at a lower corner. Slide a plastic trim tool under the edge and gently pry, working in two to three inch sections rather than yanking the whole strip at once. Support the molding as it comes free so it doesn’t snap or bend.
3. Clear the channel. Once the old molding is off, remove any broken clip stubs and old adhesive residue. A heat gun on low, followed by a plastic scraper, lifts stubborn residue without damaging paint.
4. Inspect before you install anything. Look closely at the pinch-weld channel for rust, bent metal flange, or cracked urethane bead underneath. If you see any of these, stop the project here and call a professional. Installing new molding over a damaged base just hides the problem until it fails again.
5. Dry-fit the new molding. Lay it in place without clips first to confirm it matches the curve and length of your glass. Compare it against your reference photo.
6. Install new clips and seat the molding. Push new clips into their receiving holes along the channel, then press the molding down progressively from one end to the other, working in short sections so it seats evenly rather than bunching up.
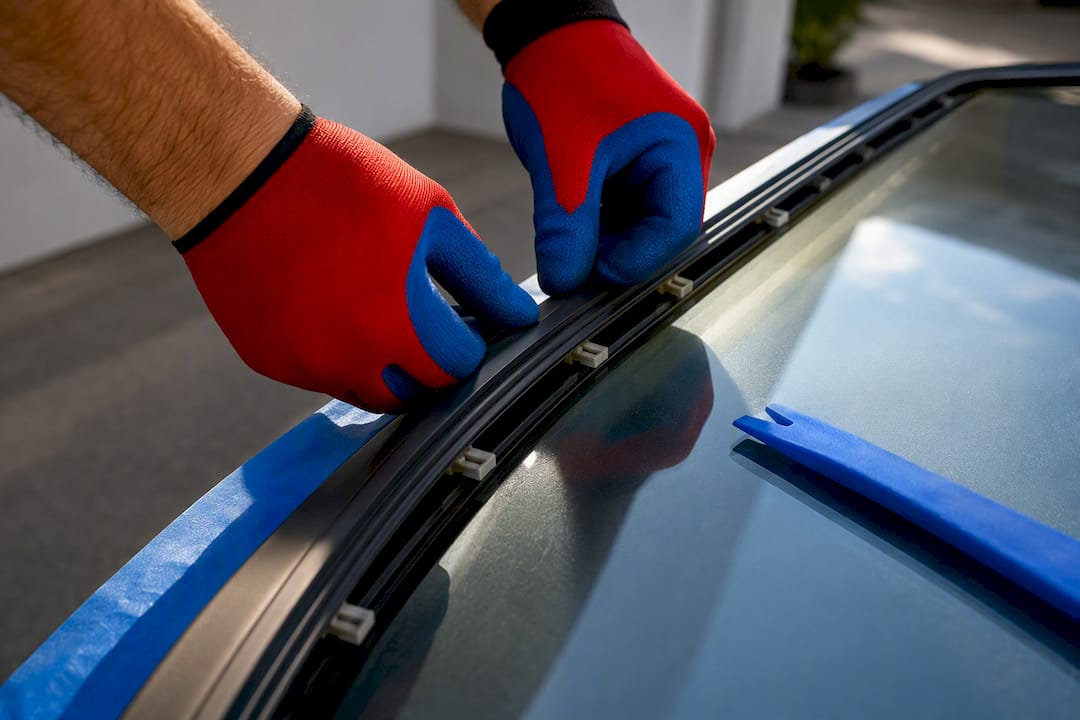
7. Trim and finish corners. Some universal strips need trimming at the corners with a sharp utility knife for a clean fit. Cut small amounts at a time.
8. Let adhesive cure if used. If your installation calls for adhesive at the ends or corners, give it the full cure time listed on the product, typically several hours, before driving in wet weather.
9. Verify your work. Run the hose test again, walk the full perimeter checking for gaps or lifted sections, and take a short test drive at both low speed and highway speed listening for whistling.
Pro Tip: Press molding into place with your palm, not your fingertips. Fingertips concentrate pressure into small dents that never fully smooth out once the trim sets.
Confirming the Installation Actually Worked
A molding job that looks fine sitting in the driveway can still fail the moment it rains or hits 65 miles per hour on the freeway. Test before you consider the job done.
- Run the hose test a second time, focusing water directly along every inch of the new molding for a full two minutes, with someone inside checking the headliner, A-pillars, and dash for moisture.
- Drive at low speed first, windows up, listening for a faint whistle near the top corners. Then take it up to highway speed, since some leaks only whistle once airflow increases.
- If you hear a whistle in one specific spot, that section likely didn’t seat fully. Reseat it with firm, even palm pressure rather than adding sealant on top.
- Replace any clip that broke during installation rather than skipping it. One missing clip is often enough to let an entire section lift over a few weeks.
- Use automotive-grade sealant sparingly, and only at manufacturer-designated points, never as a blanket fix along the whole edge.
What a Fair Quote Looks Like If You Hire a Pro
DIY parts alone typically run $30 to $120 for molding, clips, and basic adhesive. Professional molding-only replacement, where a shop swaps trim without pulling the windshield, generally falls between $125 and $400. Full windshield replacement that includes new moldings and any required calibration varies more widely, often landing $250 to $450 for basic vehicles and $700 to $1,600 or higher for vehicles with cameras or a heads-up display.
A vague phone quote is where most surprise charges start. Before you approve any work, ask the shop to itemize:
- Glass part tier (OEM, OEM-equivalent, or aftermarket)
- Moldings and clips, and whether they’re using new parts or reusing your old ones
- Adhesive and primer costs
- Whether ADAS calibration is included, and if it’s dynamic or static calibration
- Mobile service fee, if applicable
- Warranty terms on both the glass and the labor
Line items like moldings, urethane, and calibration are exactly where quotes diverge by hundreds of dollars, and calibration alone commonly adds $150 to $800 depending on how many systems the vehicle uses. A shop that won’t break these out on request is one to question.
The Safety Risk Behind a Bad Molding Job
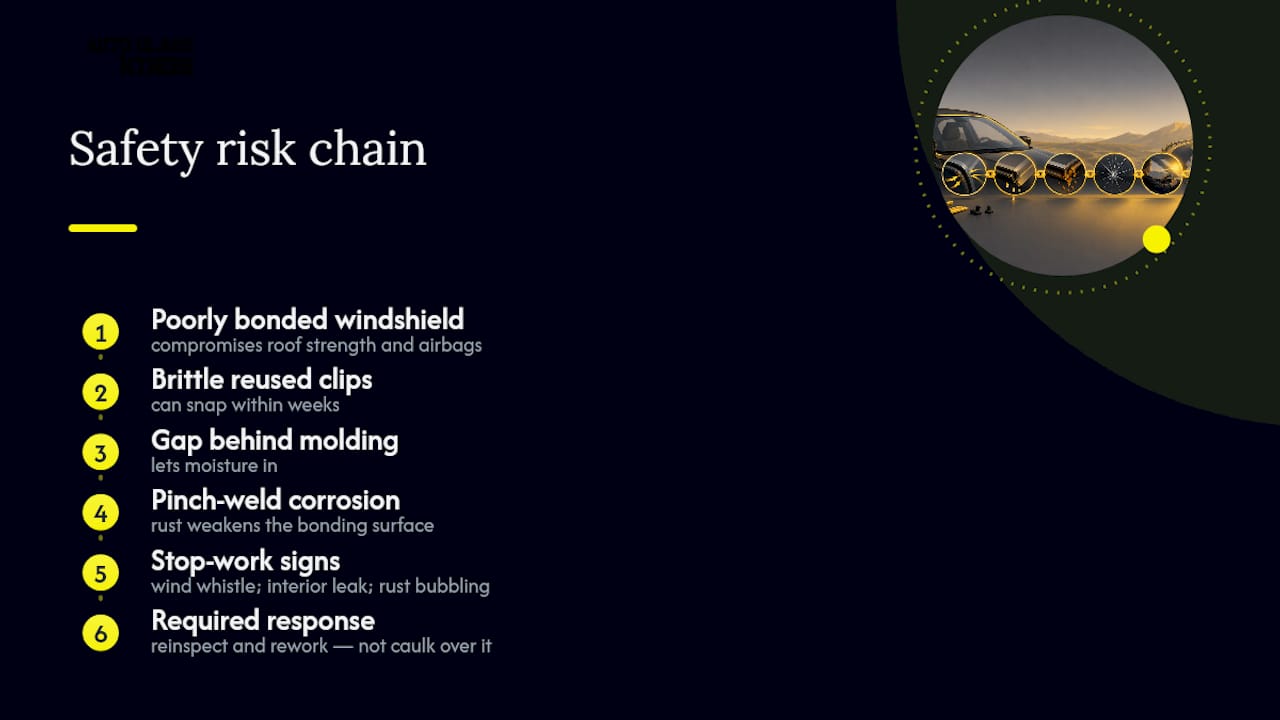
A windshield is not just a window. It’s a structural part of the vehicle’s safety cage, and a poorly bonded windshield can compromise roof strength in a rollover and even interfere with proper airbag deployment, according to guidance from AAA.
Reused clips are a quieter version of the same risk. A brittle clip that looks fine on installation day often snaps within weeks, and the gap it leaves lets moisture in behind the molding. That trapped water accelerates corrosion on the pinch-weld, and rust there weakens the very surface future adhesive needs to bond to.
Watch for three stop-work signs after any molding job, DIY or professional: a wind whistle at speed, any interior leak during rain, or visible rust bubbling under paint near the glass edge. Any one of these means the repair needs another look, not a bead of caulk over the symptom.
Our Take: When We Tell Customers to DIY and When We Don’t
Auto Glass Kings sees the same pattern constantly: simple snap-in molding on a rust-free pinch-weld with no sensors is a fair DIY project. Add rust, a bonded or encapsulated molding, or a camera and HUD setup, and it becomes professional work, full stop.
We handle the harder cases with mobile service, OEM-quality materials, a lifetime warranty, and in-house ADAS recalibration so you’re not making a separate trip to a dealership. If you’re weighing DIY against a quote, snap a photo of your windshield’s part “bug,” have your VIN ready, and photograph the molding area before you call anyone. That’s the fastest way to get an accurate quote instead of a guess.
— Auto Glass Kings
Ready to Book a Professional Windshield Molding Replacement?
If your molding is bonded, your pinch-weld shows rust, or your windshield carries ADAS sensors, that’s a professional job, not a weekend project. Auto Glass Kings comes to you with a fully mobile setup, OEM-quality parts, a lifetime warranty on every install, and ADAS calibration completed in-house on the same visit, no dealership trip required.
Have your VIN, a couple of photos of the windshield and molding area, and a short description of the symptoms (whistling, leaking, a visibly cracked edge) ready when you reach out. That’s enough for most quotes to be accurate on the first pass instead of changing once a tech arrives. Auto Glass Kings also bills most insurance carriers directly, and many customers pay nothing out of pocket. Get a windshield replacement quote started today, or check the ADAS calibration page first if your vehicle has a forward-facing camera or heads-up display.
Sources
- Windshield repairs and auto glass safety | AAA
- Car Doctor: Mirrors and Windshields | AAA Club Alliance
- Windshield Replacement Cost Breakdown: Why Quotes Vary by $800 – Auto Glass Estimator™
- Windshield Replacement Cost 2026: Full Price Breakdown
- How to replace windshield trim without damage – Carbon Collision Repair
FAQ
How much does it cost to replace windshield molding?
DIY parts typically cost $30 to $120 for molding, clips, and adhesive. Professional molding-only replacement generally runs $125 to $400, while full windshield replacement with moldings and calibration can range from $250 to $1,600 depending on your vehicle’s sensors and glass type.
Can you replace windshield molding yourself?
Yes, if it’s accessible snap-in or reveal molding on a rust-free pinch-weld with no cameras or HUD sensors nearby. Bonded, encapsulated, or gasket-style molding tied into the glass seal typically requires professional removal to avoid cracking the glass or damaging paint.
Can I drive without windshield molding?
Driving short distances without molding won’t cause an immediate mechanical failure, but it leaves the pinch-weld exposed to water, dirt, and road salt. That exposure speeds up rust, which can eventually weaken the surface the windshield bonds to, so it’s worth replacing the molding promptly rather than leaving it off.
How much does it cost to replace weather stripping on a windshield?
Weather stripping and windshield molding prices overlap closely, generally $30 to $120 for DIY parts and $125 to $400 for professional labor on an accessible piece. Full replacement involving a bonded gasket or seal tied into the glass runs higher, and Auto Glass Kings can quote it exactly once it sees photos of your specific setup.
Recommended
Share
Recent Posts
October 6, 2026
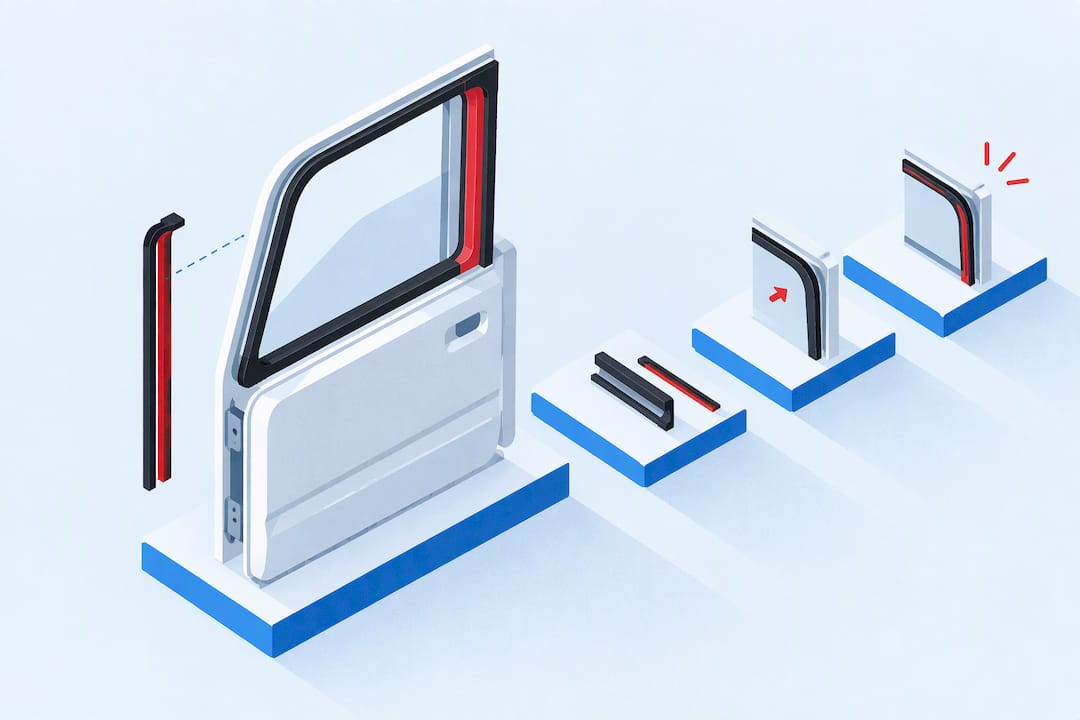
1–3 Hours Per Door: Run Channel Replacement That Puts Fitment First
DIY run channel replacement with a fitment-first approach. Follow parts, tools, and a 1–3 hours per door procedure, plus when to call a...
October 5, 2026
Expect $305–$3,400: U.S. Tesla Windshield Costs and How to Save
U.S. model-by-model Tesla windshield price ranges ($305–$3,400 observed). Practical steps to cut out-of-pocket costs, mobile ADAS calibration options, and…...
October 4, 2026
Drivers, Follow Your Installer’s Wash Time After Windshield Replacement
Follow your installer’s written safe-wash time. If none, wait 24 hours for a hand wash and 48 to 72 hours before automatic or...