
Automotive
If you just replaced your windshield or your vehicle was in a collision, you likely need ADAS calibration, and the manufacturer’s service procedure for your specific make and model decides for sure. Calibration is a safety validation step that restores the relationship between your windshield mounted camera and the road, often using static targets, a road test, or both. Auto Glass Kings and other shops that perform this work follow that OEM procedure rather than a generic rule of thumb.
TL;DR:
- Most vehicles require ADAS calibration after windshield replacement or collision repairs, following the specific OEM procedure for accuracy.
- Calibration methods vary between static targets and road testing, with some vehicles needing both to ensure proper system function.
- Calibration costs typically range from $250 to $700, depending on the method and vehicle complexity, with insurance often covering the expense.
- Proper documentation of the calibration procedure and results is essential for warranty, insurance, and resale validation.
- DIY calibration is impractical and risky; always verify that a qualified shop follows the correct OEM steps and provides detailed proof of completion.
Table of Contents
- What windshield ADAS calibration actually does
- When calibration is required: OEM trigger conditions and scenarios
- Static versus dynamic calibration: what each involves
- What actually happens during a calibration appointment
- Costs, insurance coverage, and typical timelines
- Can you DIY ADAS calibration?
- Why the OEM service manual controls the answer
- How Auto Glass Kings handles windshield replacement and calibration
- Why following OEM procedure protects your safety and resale value
- How Auto Glass Kings can help: what to ask for when booking
- Sources
- FAQ
What windshield ADAS calibration actually does
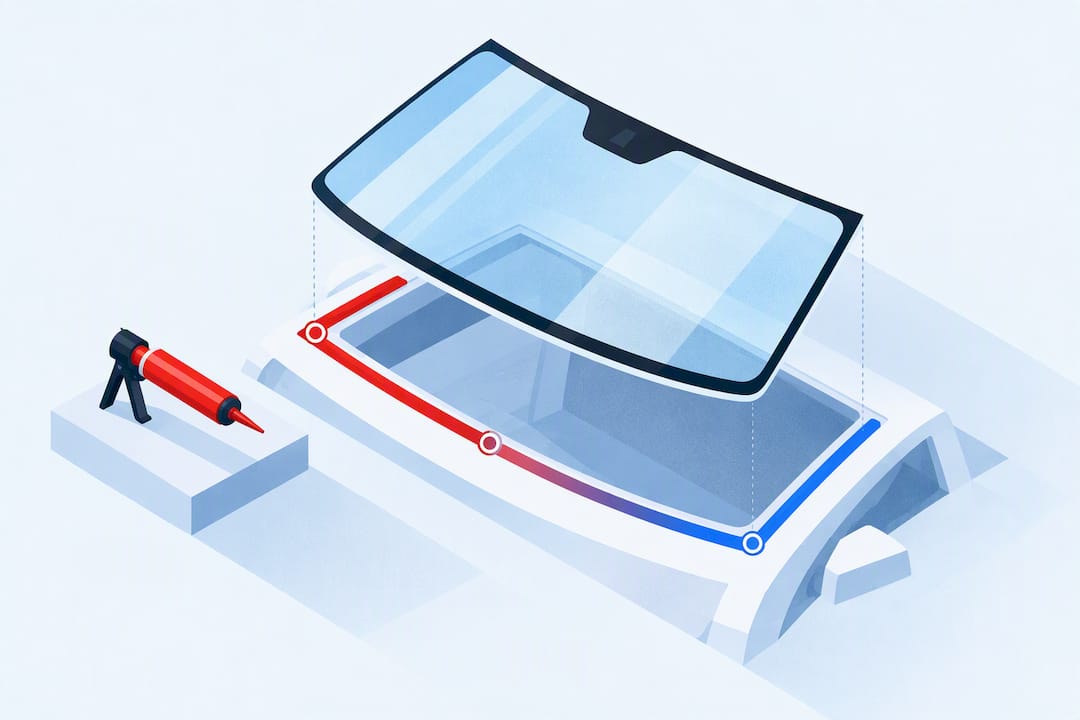
Advanced driver assistance systems like lane departure warning, automatic emergency braking, and adaptive cruise control rely on a forward facing camera mounted near the top of your windshield. That camera has to “see” the road at a precise angle. When a shop removes and replaces the glass, even careful, correctly done work shifts the camera’s position by a fraction of a degree, enough to throw off how the system reads lane lines, other vehicles, or pedestrians.
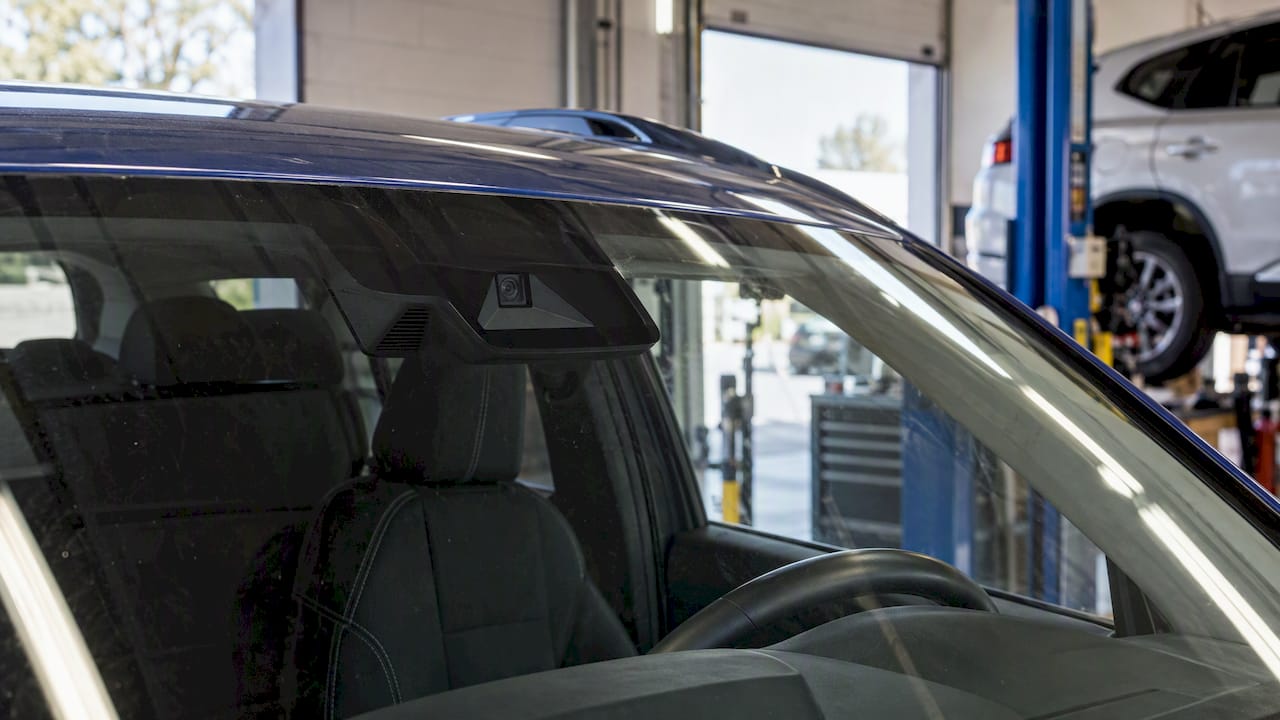
Calibration corrects that. It is not a cosmetic adjustment or an optional upsell: it is the process that restores the camera’s known relationship to the vehicle and road, and industry guidance frames it as a functional safety step required after certain repairs or modifications, not a courtesy service.
Several ADAS features commonly depend on that windshield mounted camera and are sensitive to even small misalignment:
- Lane departure warning and lane keeping assist, which read painted lane markings.
- Automatic emergency braking, which times its response off distance and closing speed.
- Adaptive cruise control, which tracks the vehicle ahead to hold following distance.
- Traffic sign recognition, which reads posted speed limits and warning signs.
A camera that is off by even a small margin can misjudge distance or fail to recognize a lane line at all, which is why SAE’s aftermarket calibration research treats recalibration and documentation as necessary steps after repair, not optional extras.
When calibration is required: OEM trigger conditions and scenarios
A handful of repair events reliably trigger a calibration requirement, and windshield replacement is the most common one drivers encounter. Others include:
- Windshield replacement or removal, since the camera bracket is disturbed even during careful work.
- Removing or reinstalling the rearview mirror or camera housing.
- A front end collision, even a minor one, that could shift the camera, radar, or bumper sensors.
- Replacing a radar module, sensor, or related electronic component.
- Suspension or alignment work that changes the vehicle’s ride height or stance.
None of these triggers guarantee the same calibration steps across brands. One manufacturer might call for a brief road test, another might require static targets set up in a controlled bay, and a few require both. This is the core reason a blanket yes or no answer rarely holds up: OEM procedures documented through ALLDATA show real examples where Ford specifies a short road test while Subaru’s EyeSight system needs target based inspection and adjustment.
The reliable way to know what your vehicle needs is to check your owner’s manual, look for a relevant service bulletin, or simply ask the shop doing the work to state the exact OEM procedure for your make, model, and year. A shop that can’t name the procedure it’s following is a shop that can’t confirm the calibration was actually necessary or complete.
Static versus dynamic calibration: what each involves
Shops use two main calibration methods, and which one your vehicle needs depends entirely on the manufacturer’s specification.
- Static calibration uses physical targets, typically printed boards or patterns, set up at exact distances and heights around the vehicle in a controlled, level space. Technicians use measuring tools, sometimes a plumb bob, and a scan tool connected to the vehicle’s diagnostic port to walk the camera through the manufacturer’s aim sequence.
- Dynamic calibration requires driving the vehicle at a specified speed range, sometimes for a set distance or duration, while the system recalibrates itself against lane markings and traffic in real conditions. OEM position statements note that dynamic verification often involves test drives of roughly 10 to 15 minutes above a minimum speed threshold.
- Hybrid workflows combine both: a static target session to get the camera aimed correctly, followed by a road test to confirm the system performs as expected under real driving conditions.
Static calibration needs space, a level floor, controlled lighting, and enough clearance to place targets at the distances the OEM procedure specifies, which is why some shops handle it in a dedicated bay rather than curbside. Dynamic calibration needs the right road conditions and enough time to complete the specified drive without interruption. ALLDATA’s documentation of OEM procedures makes clear that neither method is universal. Your vehicle’s manual or the shop’s OEM lookup determines which applies.
What actually happens during a calibration appointment
A calibration appointment follows a fairly consistent sequence, even though the specific steps vary by vehicle.
- Pre-checks first. The technician inspects the new windshield installation, checks tire pressure and alignment since both affect vehicle stance, and runs a diagnostic scan to confirm no pre-existing fault codes are present.
- Hardware and environment setup. For static calibration, this means placing targets at OEM specified distances and angles on a level surface. For dynamic calibration, it means confirming road and traffic conditions suit the required test drive.
- Calibration itself. The technician connects a scan tool to the vehicle’s diagnostic port, runs the manufacturer’s calibration routine, takes static measurements if required, or completes the specified road test at the correct speed and duration.
- Clearing codes and confirming status. Once calibration completes, the technician clears any related diagnostic trouble codes and confirms the system reports a successful calibration status rather than a pending or failed one.
- Verification and documentation. A responsible shop performs a final test drive, checks that warning lights are off, and provides a written record of what was done.
Pro Tip: Ask for a copy of the calibration report before you leave. It should reference the OEM procedure used, the calibration result, and confirmation that diagnostic codes were cleared.
That documentation matters beyond peace of mind. SAE’s guidance on aftermarket sensor calibration stresses that calibration work should be documented and that shops should be able to explain both the procedure and how completion was verified. If a shop can’t produce that, you have no proof the system was actually validated, only that someone said it was fine.
Costs, insurance coverage, and typical timelines
Calibration pricing varies with vehicle complexity and method. A car that only needs a dynamic road test typically costs less than one requiring precise static target setup or specialized dealer tooling. Auto Glass Kings prices ADAS calibration between $250 and $700, a range that reflects exactly this kind of variability between vehicles and calibration types.
What drives the cost up or down:
- Whether the vehicle needs static targets, a dynamic drive, or both.
- Whether dealer-specific tools or software are required for that make.
- How much setup space and time the static procedure demands.
Insurance commonly covers calibration when it’s tied to an approved glass replacement or collision repair claim, though coverage details depend on your policy and carrier. It’s worth getting pre-approval from your insurer before the appointment so there’s no confusion about what’s covered.
Regulatory attention on ADAS performance is increasing. The US DOT’s NCAP roadmap update adds new driver assistance technologies to its formal assessment program, which signals growing scrutiny of how well these systems perform after repair work, not just whether they’re present.
As for timing, a straightforward dynamic calibration might add well under an hour to a windshield replacement. A vehicle that requires static targets and a controlled setup usually takes longer and may require shop space rather than a driveway or parking lot.
Can you DIY ADAS calibration?
Technically no law stops you from attempting it, but in practice DIY calibration is rarely realistic for most vehicle owners. The barriers are real ones:
- Static calibration requires OEM specific target boards, precise measuring equipment, and a scan tool capable of running the manufacturer’s calibration routine, none of which a typical owner has on hand.
- Target placement has to match exact distances and angles from the OEM procedure. Being off by a small amount can produce a calibration that reports success but performs incorrectly.
- Verifying the result requires knowing what a correct calibration status actually looks like on that vehicle’s system, which varies by manufacturer.
Pro Tip: A quick owner-level check, confirming your dashboard shows no ADAS warning lights and that features like lane keeping visibly respond, is a reasonable sanity check. It is not a substitute for a verified, documented calibration.
The risk of skipping or botching calibration isn’t abstract. A miscalibrated camera can produce false alarms, fail to intervene when it should, and create complications for insurance claims or warranty coverage if the system is later found to have been improperly calibrated. When in doubt, a qualified shop with the right tools is the safer and, in most cases, only practical route.
Why the OEM service manual controls the answer
Manufacturers don’t agree on how calibration should be performed, and that’s the main reason generic advice falls short. Some brands specify static target calibration exclusively, others rely on dynamic road tests, and a growing number require both in sequence. ALLDATA’s review of OEM windshield replacement procedures shows that replacement glass itself sometimes has to include specific locating pins or spacers to keep the camera properly positioned, a requirement that varies by manufacturer and that a generic aftermarket windshield may not meet.
Because of that variability, documentation matters more than it might seem. A shop should be able to provide:
- A calibration report naming the specific OEM procedure followed.
- Diagnostic logs showing the vehicle’s pre and post calibration status.
- Confirmation that related trouble codes were cleared after a successful result.
That paperwork protects you three ways: it confirms the safety system actually works as intended, it supports any future warranty claim tied to the repair, and it gives a future buyer or appraiser proof the work was done correctly at resale.
How Auto Glass Kings handles windshield replacement and calibration
Auto Glass Kings performs windshield replacement and ADAS calibration in-house, on-site, in a single mobile visit, so customers aren’t sent to a separate shop or dealership to finish the job. That matches the procedural steps above: inspection and diagnostic scan, target setup or road test as the vehicle’s OEM procedure requires, and post-calibration verification before the technician leaves.
The company uses quality materials, backs installs with a warranty, and handles insurance billing directly. For a service range that includes windshield replacement on vehicles from classics to high-end brands, keeping calibration in-house removes one of the biggest friction points drivers run into: a second appointment just to get the safety system working again.
Why following OEM procedure protects your safety and resale value
I’d rather see a driver ask three pointed questions, what OEM procedure applies to my vehicle, what documentation will I receive, and has my insurer pre-approved this, than simply trust that “calibration was done.” The paperwork is the part that protects you after the appointment ends: it’s what a future mechanic, insurer, or buyer will actually check.
Skipping that step doesn’t save meaningful time. It just moves the risk to a moment when you’re relying on a safety system that was never properly verified.
— Auto Glass Kings
How Auto Glass Kings can help: what to ask for when booking
Mobile service means you don’t lose a day sitting in a waiting room, and in-house calibration means the safety validation step happens the same visit as your glass work, not as a separate appointment somewhere else.
Auto Glass Kings offers windshield replacement, windshield repair priced between $79 and $129, side window replacement starting from $189, back window replacement starting from $350, quarter and vent glass replacement, and ADAS calibration priced between $250 and $700, all backed by a lifetime warranty. Before you book anywhere, confirm these points:
- The shop can name the exact OEM calibration procedure for your vehicle.
- You’ll receive a written calibration report, not just a verbal confirmation.
- Insurance billing is handled directly so you know your out-of-pocket cost upfront.
| What to confirm | Why it matters |
|---|---|
| OEM procedure named | Confirms the correct static, dynamic, or hybrid method was used |
| Written calibration report | Provides proof for warranty, insurance, and resale |
| Insurance pre-approval | Avoids surprise costs tied to the calibration |
| Lifetime warranty on install | Covers the windshield work behind the calibration |
If you need a windshield replaced and calibration confirmed in one visit, request a quote and Auto Glass Kings will walk you through what your specific vehicle requires.
Sources
For vehicle-specific instructions, your owner’s manual and dealer are the final word. These references informed this guide:
- ADAS calibration : r/autoglass (I-CAR / SAE summary)
- Cracking ADAS – Windshield Replacement | ALLDATA
- EPR2021008: Unsettled Issues on Sensor Calibration for Automotive Aftermarket ADAS
- New Car Assessment Program Final Decision Notice-Advanced Driver Assistance Systems and Roadmap | US DOT
FAQ
Does replacing a windshield require ADAS calibration?
In most cases, yes, since removing and reinstalling the glass disturbs the camera’s position enough to require recalibration. Whether your vehicle needs static targets, a dynamic road test, or both depends on the manufacturer’s specific procedure.
How much does it cost to calibrate ADAS?
Cost depends on the vehicle and calibration method required. Auto Glass Kings prices ADAS calibration between $250 and $700, reflecting differences between simpler dynamic calibrations and more involved static target setups.
Can I do ADAS calibration myself?
It’s technically possible but rarely practical, since static calibration requires OEM specific targets, precise measuring tools, and diagnostic equipment most owners don’t have. Improper calibration can leave safety systems reporting a false success while actually misreading the road, so professional calibration with documentation is the safer route for most drivers.
How can I tell if my vehicle needs calibration after a repair?
Check your owner’s manual or a relevant service bulletin for your specific make, model, and year, since requirements vary significantly between manufacturers. If you’re unsure, ask the shop performing the repair to confirm the exact OEM procedure that applies to your vehicle before the work begins.
What documentation should I get after ADAS calibration?
Ask for a calibration report that names the OEM procedure followed, confirms the result, and shows that related diagnostic trouble codes were cleared. This record supports any future warranty claim, insurance question, or resale conversation tied to the repair.
Recommended
- Auto Glass Replacement in Orange County: Cost, Process, and What to Expect
- Auto Glass Replacement: A Complete Guide for US Drivers
🎧 Listen to This Article
Share
Recent Posts
October 6, 2026
1–3 Hours Per Door: Run Channel Replacement That Puts Fitment First
DIY run channel replacement with a fitment-first approach. Follow parts, tools, and a 1–3 hours per door procedure, plus when to call a...
October 5, 2026
Expect $305–$3,400: U.S. Tesla Windshield Costs and How to Save
U.S. model-by-model Tesla windshield price ranges ($305–$3,400 observed). Practical steps to cut out-of-pocket costs, mobile ADAS calibration options, and…...
October 4, 2026
Drivers, Follow Your Installer’s Wash Time After Windshield Replacement
Follow your installer’s written safe-wash time. If none, wait 24 hours for a hand wash and 48 to 72 hours before automatic or...