
Automotive
Most clogged sunroof drains can be cleared at home in about 10 to 30 minutes with a shop vacuum and a length of vinyl tubing, or a small flexible cable if the vacuum alone doesn’t do the job. The safest approach is always the least invasive one: never force a stiff wire down the tube, and skip the air compressor since a blast of high-pressure air can dislodge or disconnect the hose instead of clearing it. If the tubing looks brittle, disconnected, or you spot a leak inside the pillar itself, stop and call a professional.
TL;DR:
- Most clogged sunroof drains can be cleared at home within 10 to 30 minutes using a shop vacuum and vinyl tubing, avoiding the use of rigid wires or high-pressure air.
- Confirming a clog involves pouring water into each drain corner and watching for slow or no draining, which indicates blockage between the tray and exit point.
- Regular maintenance involves yearly inspections, simple flushing, and clearing debris, with extra checks recommended for cars parked under trees or exposed to pollen.
- If tubing is damaged, disconnected, or water persists in leaks after flushing, professional repair is advised to replace or reseat the drain components safely.
- When drain issues involve interior trim, wiring, or airbag components, a certified mobile technician offers a safer, more efficient solution than DIY attempts.
Table of Contents
- How to tell your sunroof drain is clogged
- Where sunroof drains are located and how water exits
- What you need before you start (and what to avoid)
- Step-by-step: clearing a clogged sunroof drain safely
- When the problem is bigger than a simple clog
- When a mobile technician makes more sense than another DIY attempt
- How often to check and clean sunroof drains
- Sources
- FAQ
How to tell your sunroof drain is clogged
A clogged drain rarely announces itself clearly, but a few signs point straight at it. Water has nowhere else to go once the trough overflows, so it finds the nearest gap, usually around the headliner or dome light.
- A wet or stained headliner, especially after rain or a car wash
- Dripping near the dome light or sun visor mounts
- Water pooling in the front or rear footwells with no obvious source
- A slurping sound when you pour water into the drain trough
The quickest way to confirm the problem is to pour a cup of water slowly into each corner of the sunroof trough and watch what happens. Water should disappear quickly and quietly; if it pools, backs up, or takes a long time to drain, that corner is likely blocked. Following the exterior exit point while a helper pours water will confirm whether the tube is routed and draining as expected.
Where sunroof drains are located and how water exits
Most sunroofs use four drain points, one at each corner of the sunroof frame. From there, rubber or plastic tubing runs down through the A, B, C, or D pillars and exits near the wheel wells or the door hinge area, depending on the vehicle.
- Front corners typically drain down the A-pillars and exit near the front wheel wells
- Rear corners typically drain down the C or D pillars and exit near the rear wheels or lower door hinges
- Some vehicles route one or more drains behind interior trim panels that require partial disassembly to access
To trace the path on your own car, open the sunroof, locate the small drain holes at each corner of the tray, and have someone pour water in while you check underneath the vehicle near the wheel wells for a steady trickle. No trickle at a given corner usually means that line is blocked somewhere between the tray and the exit.
What you need before you start (and what to avoid)
Gather your tools before opening any trim. A shop vacuum with a hose-end reducer, a length of clear vinyl tubing, a bicycle gear shift cable or an old speedometer cable, a small funnel or squeeze bottle, a flashlight, towels, and a pair of gloves cover nearly every DIY scenario.
- Shop vacuum with a narrow attachment or a vinyl tubing reducer
- Clear vinyl tubing, roughly the diameter of the drain hole
- A flexible bicycle gear cable or speedometer cable for gentle snaking
- Funnel or squeeze bottle for controlled water flushing
- Towels, a flashlight, and gloves for cleanup and visibility
Skip coat hangers, stiff wire, or anything rigid, since these can puncture the soft tubing instead of clearing the clog. Also avoid an air compressor, which can push the tube off its fitting entirely and turn a simple clean into a trim removal job. Park on level ground, protect the seats and dash with towels, and disconnect the battery only if you plan to remove trim near airbag wiring.
Pro Tip: Keep a small notebook of which corner drains freely and which doesn’t. It saves time if the clog comes back next season.
Step-by-step: clearing a clogged sunroof drain safely
Work from the gentlest method to the more involved ones, and stop as soon as water flows freely.
- Clear visible debris first. Open the sunroof and vacuum out the tray, removing leaves, seeds, and grit before touching the drain tubes themselves.
- Flush each corner with water. Pour a measured amount into one drain hole at a time and watch the corresponding exterior exit point for a steady flow.
- Note which corner is blocked. If water backs up in the tray instead of exiting below the car, that drain line needs attention.
- Try the vacuum-suction method. Fit a length of clear vinyl tubing over the vacuum hose’s reducer, seal it gently against the drain hole, and run the vacuum for a few seconds at a time to pull the clog toward the tray.
- Switch to the snake method if needed. Feed a bicycle gear cable or speedometer cable a few inches into the drain, twisting gently rather than pushing hard, then pull back and flush again.
- Reflush to confirm the fix. Pour water into the same corner and listen for the audible slurp that signals a clear line; not every car slurps, but hearing one is a strong sign the path is open.
- Check the exterior outlet. Confirm water is exiting near the wheel well or hinge area, and reseat any loose spout you can see or reach without removing trim.
- Repeat for each corner. Work through all four drains the same way, since one clear corner doesn’t guarantee the others are fine.
Most people clear a single clogged corner within about 10 minutes using this sequence. If water still won’t flow after a few gentle attempts with the cable, or if you feel resistance that doesn’t budge, stop. Continuing to push at that point risks kinking or puncturing the tube rather than clearing it.
Pro Tip: A funnel taped loosely to the drain hole makes it much easier to pour a steady, controlled stream without splashing water onto electronics below.
When the problem is bigger than a simple clog
Some sunroof drain issues go beyond what a vacuum or cable can fix. If the tubing feels brittle, has come apart at a fitting, or you still see interior leaks after flushing and snaking every corner, the tube itself is likely the problem rather than debris inside it.
- Tubing that has cracked, split, or disconnected from its fitting
- Water still tracking toward the headliner or footwells after multiple flush attempts
- Any dampness near wiring harnesses, fuse boxes, or electronic modules
- A cable or tube that feels kinked and won’t straighten with gentle manipulation
A professional repair in these cases usually means removing A-pillar or headliner trim to access the drain tube directly, since some vehicles require lowering the headliner just to reach the rear drains. From there, a technician can replace a damaged section of tubing, reseat a disconnected outlet, or address any water damage that’s already worked its way into carpet padding or electrical connectors. On some models, a twisted or trapped front drain tube is a known issue that calls for careful inspection and, occasionally, a full tube replacement. This kind of work involves fragile trim and sits close to airbag wiring in many cars, which is exactly the situation where a trained technician is worth the cost over another DIY attempt.
When a mobile technician makes more sense than another DIY attempt
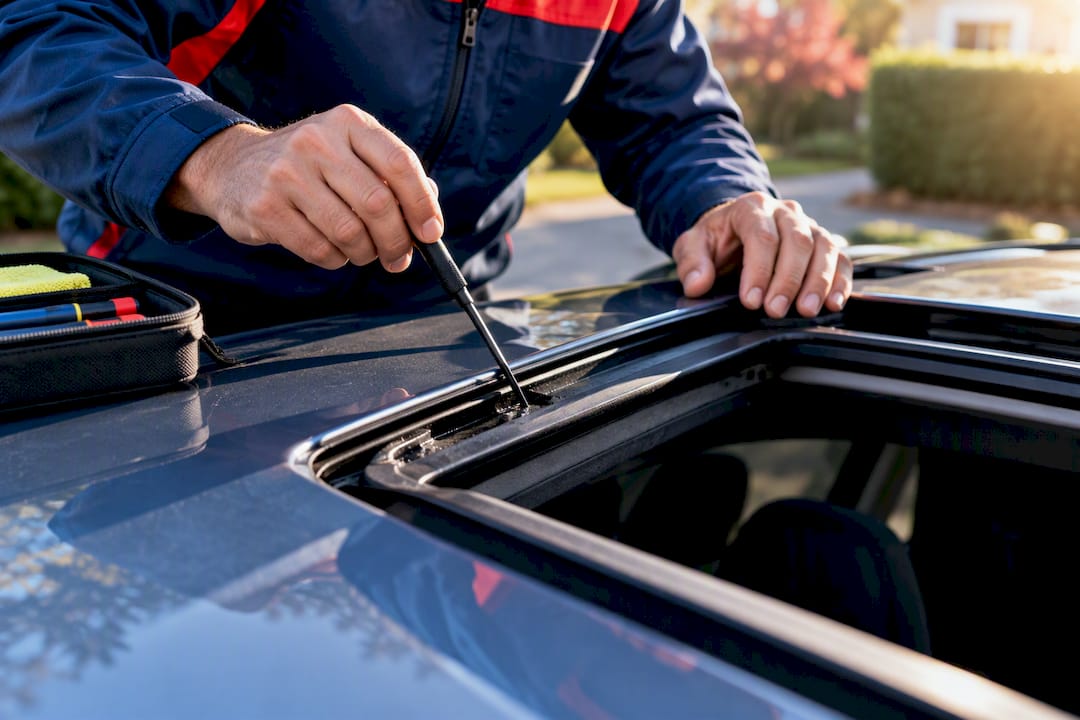
Once a drain problem involves trim removal, a damaged tube, or anything near airbag components, it stops being a weekend project and starts being a job for someone who does this regularly. A mobile technician can inspect the drain path, replace brittle or disconnected tubing, and reseat outlets on-site, without the back-and-forth of dropping the car at a shop and waiting for parts.
A mobile technician can provide services using quality materials and backing installs with a warranty, all completed at your location rather than requiring a separate shop visit. When trim or glass work overlaps with sensor housings, on-site ADAS calibration can eliminate the need to schedule a second appointment elsewhere. If your sunroof drain issue involves interior trim near airbag wiring or electronics that shouldn’t be disturbed by trial and error, choosing a qualified mobile service protects both your car and your time.
— Auto Glass Kings
How often to check and clean sunroof drains
A once-a-year check keeps most drains clear, but cars parked under trees or exposed to heavy pollen and leaf drop benefit from a second check midyear. Some maintenance guidance recommends inspecting drains at least every two years or 40,000 miles at a minimum, though annual checks catch small clogs before they become bigger problems.
- Vacuum and brush out the sunroof tray to remove loose debris
- Flush each of the four corners with a small amount of water
- Clear visible leaves, seeds, or grit before they get pushed into the tubing
- Park under a sunshade or away from trees when possible to cut down on debris buildup
Keep a small kit of vinyl tubing, a spare cable, and a funnel in the garage so a seasonal check takes minutes rather than a full afternoon. Pairing this with a general glass and trim cleaning routine around the sunroof frame helps you spot early signs of wear before they turn into a leak.
Sources
- How to fix a leaking sunroof (Family Handyman)
- 3 reasons your sunroof might be leaking | Capital One Cars
- Driving
- BMW X5 sunroof leak/drain cleaning (BMW Repair Guide)
FAQ
How much does it cost to unclog a sunroof drain?
Clearing a clogged sunroof drain yourself costs very little since a shop vacuum, vinyl tubing, and a spare bicycle cable are the only real expenses. If the tubing is damaged and needs professional replacement, cost depends on the vehicle and how much trim removal is involved, so it’s best to get a quote directly from a repair shop.
How often should sunroof drains be cleaned?
A yearly check is a reasonable baseline for most drivers, with a second check midyear if your car sits under trees or through heavy pollen season. Some maintenance guidance suggests inspecting drains at least every two years or 40,000 miles at a minimum.
Does car insurance cover sunroof leaks?
Coverage depends on your policy and the cause of the leak, since routine maintenance issues like a debris clog are typically the owner’s responsibility. Comprehensive coverage may apply if the leak resulted from an accident, storm damage, or another covered event, so it’s worth checking your specific policy terms.
Where are sunroof drains usually located?
Most sunroofs have drain holes at all four corners of the sunroof tray, with tubing running down the pillars to exit near the wheel wells or door hinge areas. The exact routing varies by vehicle, so tracing the path with water is the most reliable way to confirm it on your own car.
Recommended
- Auto Glass Replacement: A Complete Guide for US Drivers
- Auto glass replacement: 7 common mistakes to avoid
🎧 Listen to This Article
Share
Recent Posts
October 6, 2026
1–3 Hours Per Door: Run Channel Replacement That Puts Fitment First
DIY run channel replacement with a fitment-first approach. Follow parts, tools, and a 1–3 hours per door procedure, plus when to call a...

October 5, 2026
Expect $305–$3,400: U.S. Tesla Windshield Costs and How to Save
U.S. model-by-model Tesla windshield price ranges ($305–$3,400 observed). Practical steps to cut out-of-pocket costs, mobile ADAS calibration options, and…...
October 4, 2026
Drivers, Follow Your Installer’s Wash Time After Windshield Replacement
Follow your installer’s written safe-wash time. If none, wait 24 hours for a hand wash and 48 to 72 hours before automatic or...